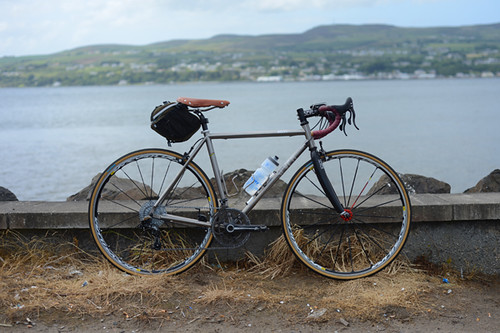
For the past few weeks I've been riding with an experimental drivetrain on my main roadbike "Desdemona" (a Seven Axiom S).The goal of this drivetrain was to achieve very low (sub 1:1) gearing, for hilly long distance cycling, including brevets. There are several ways to get that kind of gearing, some of which I've tried in the past with mixed results. The tricky part is not the gearing in itself, but achieving it with a modern (i.e. integrated shifters), lightweight road drivetrain, while keeping everything working smoothly. At the moment no road group from Campagnolo, Shimano or SRAM is designed to handle gears quite this low, so modifications are needed.
A hybrid drivetrain means that the parts making it up (cassette, derailleurs, crankset and brake/shift levers) are not all from the same manufacturer or group.Since modern road groups are designed for all the parts to work together, modifying or mixing them is generally not advised. That said, there aretwo general methods of doing so in order to get low gears. One is to keep most of the group intact, except for the crankset - replacing it with either a triple, or a double with much smaller chainrings (either way, inevitably foreign to the group). The other is to keep most of the group intact, except for the cassette - replacing it with a wider touring cassette (and long cage derailleur to accommodate). Speaking purely for myself, I have not been 100% happy with what happens when a modern road group's native crankset is replaced with a foreign one. So this time around, I opted for the other method.After 600 miles, what impresses me is that, in addition to being useful, this is also the least finicky hybrid drivetrain I've tried to date.
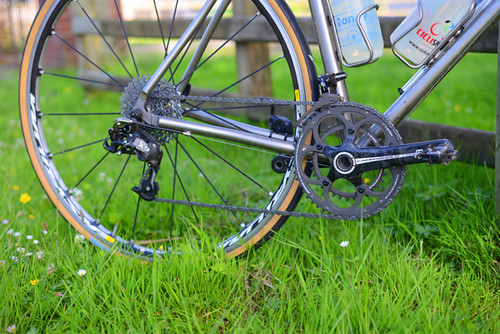
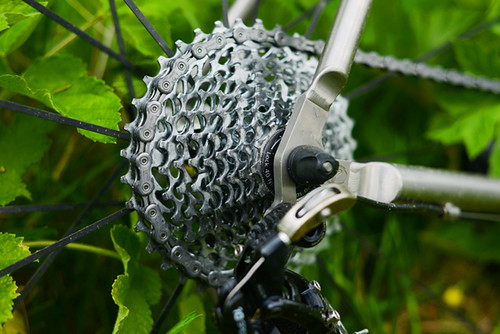
The setup here is a "SRampagnolo" hybrid. We've kept the front end of my bike's native Campagnolo Chorus drivetrain (50/34t crankset, front derailleur and 11-speed ergo levers), but used a SRAM 10-speed 11-36t cassetteand a SRAM X9 long cage rear derailleur.

A Jtek Shiftmate (model #4 I believe) makes the SRAM 10-speed cassette compatible with the 11-speed Campagnolo levers. You can read all about this neat little converter here. Obviously, if you are starting with a SRAM or Shimano drivetrain, your setup will be different. Going with all-SRAM should be the easiest, because, as far as I know, their road and mountain groups are compatible. Shimano I am less sure about.
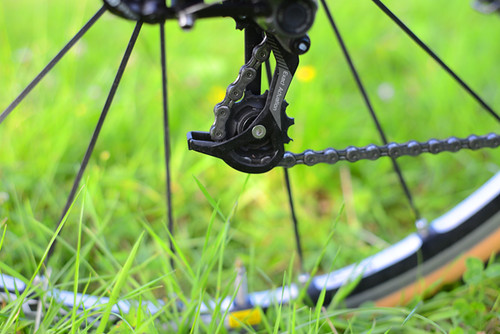
The decision to go with the SRAM X9 long cage derailleur was made, despite some reports that the new SRAM WiFli road derailleur (designed to handle up to a 32t cog) can in fact handle a 36t. Seven's Rob Vandermark tested the WiFli with the 11-36t cassette, and was not happy with the outcome. That was good enough reason for me to go with the X9.
As far as functionality of the drivetrain, there is not much to say other than "It works." The entire range of cogs, from 11t to 36t, is usable in both rings. Cross-chaining has not been a problem in either combination (the derailleur does not explode in big-big and the chain does not go slack in small-small). Chain drop has not been a problem.The fact that the shifters are 11-speed while the cassette is a 10-speed is not noticeable. The Jtek converter works flawlessly and does not call attention to itself. After 600 miles of using the entire range of gears and switching between big and small rings constantly (including under load, and including when cross-chaining) I have not yet dropped the chain, gotten the chain stuck between rings, or even mis-shifted. In all ways, the drivetrain functions as smoothly as it did when the original groupset was intact. To be honest, even in the best case scenario I did not expect it to work quite this well.
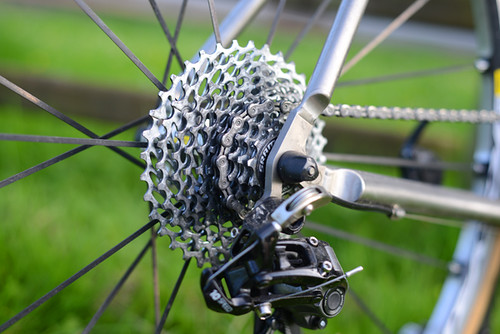
As far as usefulness of the gear range, this too has exceeded my expectations. The cassette is spaced asymmetrically, so that the smaller cogs are closer together and the bigger cogs wider apart. The exact combination is:11-13-15-17-19-22-25-28-32-36. With the 50/34t compact double, this combination almost feels like having two separate cassettes at my disposal: One for fast rides and the other with bailout gears for climbing either very long or very steep hills (or both!). Normally, I find myself riding in the big ring, in the middle of the cassette. One unexpected outcome of this, is that the setup encourages me to use bigger gears - something that has proven helpful over the past weeks of learning different climbing techniques and trying some interval training on flats. I was so focused on getting the low gears I wanted, it did not occur to me how much I would appreciate having the really high gears as well.The small cogs are not quite as tightly spaced as they would be on a racing cassette, but they are tight enough for me.
And of course at the low end of the range, the sub 1:1 ratio offered by the 34/36t combination is a dreamy bailout gear - especially considering how lightweight my bike is and how nicely it climbs in general. This end of the spectrum does come in handy on long rides over steep hills. For paved riding, this is now truly a go-anywhere bike.
While I expected the wide spacing to feel like a compromise, in practice it doesn't. On my dirt road bike, the spacing is tighter with a 12-29t Campagnolo road cassette. While my low gear on that bike is very similar to what is described here (28/29t with 650B wheels), on the high end it maxes out at 42/12t. I notice this more than I notice the difference in cog spacing.To be able to fly in 50/11t with my legs on fire and the next day spin up a vertical hill while humming happily in 34/36t,on the same bike,is, like, wow.
On the downside, the wide cassette does mean a bit of extra weight in the rear coming from the bigger cogs, long cage derailleur, extra chain length and Jtek pulley. Around 200-300g is the difference between this and my original drivetrain. Holding the bike up in my hands, it does tip to the rear a tad now, whereas before it was a masterpiece of perfect balance. In motion, I do not feel the extra weight. And whether it's bike related or not, my average speeds over the past few weeks here in Northern Ireland have been faster than previously. I really feel that I have the best of both worlds now with this bike.Since this is a temporary setup (an experiment for Seven Cycles, as much as for me - they may offer this option on custom builds in future), a different rear wheel was built for the purpose of testing it. I still have my bike's original Campagnolo wheel, derailleur and cassette, and can get my old setup back fairly quickly. But I think I will end up keeping this one, at least for the time being.
Visually, I admit the huge cassette does not exactly look elegant. The local roadies here have quickly dubbed it "the frying pan" and I've adapted the term affectionately. I may not be able to fry eggs on it, but I can can go far and I can go fast. Now we're cooking!


 Jasia has posted the 64th Edition of the Carnival of Genealogy, the topic this time around was Winter Photo Essay. Thirty contributors featured a variety of "winter" photographs. A chilly trip back in time to be sure, but heartwarming nevertheless.
 If you haven't ever done the Happy Dance, tell us what you think it would take for you to do so."
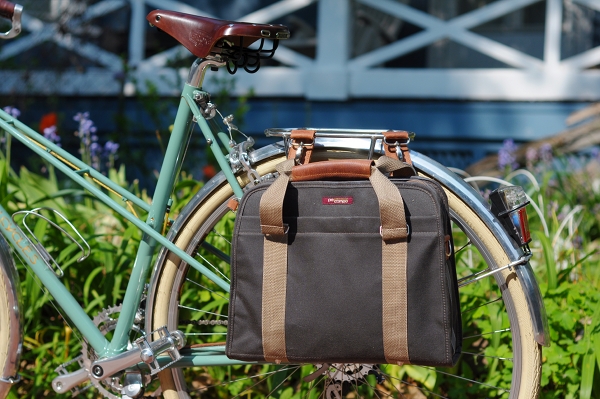 Po Campo is a small Chicago-based company that has been making a variety of bicycle-compatible women's handbags since . This year they introduced a larger, briefcase-like pannier to their lineup and I acquired one in trade a couple of months ago. The Loop Pannier is available in several floral patterns, but I opted for the more subdued waxed canvas version. It is umber with tan straps, metal buckles, and honey leather trim. At 14"x10"x3.5" the size is small enough so that there is no heel strike on bikes with short chainstays, but large enough so as to fit some laptops. These bags are designed to be used on the bike as panniers, off the bike as shoulder bags, and as luggage attachments while traveling.
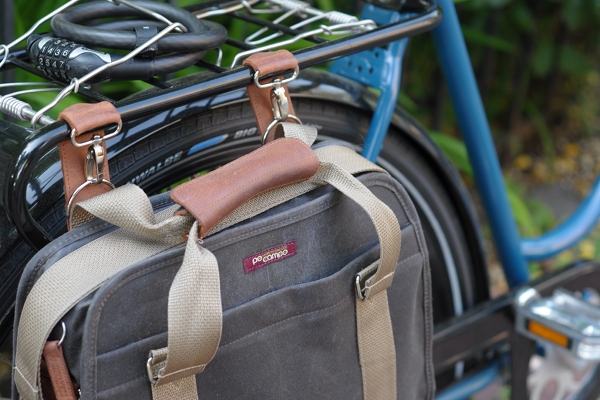 The Po Campo attachment system consists of leather straps with sturdy metal clasps.When I saw this, it was one of those "why did no one else think of this earlier?" moments. The benefit of this design is that it can fit bicycle racks with any tubing diameter. Other quick-release systems max out at 16mm tops, which means that they will not fit some heavy-duty Dutch and Roadster racks. None of our other panniers are compatible with the monstrous tubing on this Pilen rack - but the Po Campo straps have plenty of room to spare.
 While using the clasps is not quite as instantaneous as the sort of quick release where you lift up the handle and the hooks open up, it is still easy and quick.
 Since the straps are soft and flexible, they also offer the benefit of being adaptable to the rack's layout. Some racks have complicated rat-trap setups that can interfere with typical pannier hooks. The Po Campostraps can simply be looped around them. The more I used this system, the more I began to appreciate the design. Those who dislike plastic hooks will also rejoice at the complete lack of plastic here; it's all metal.
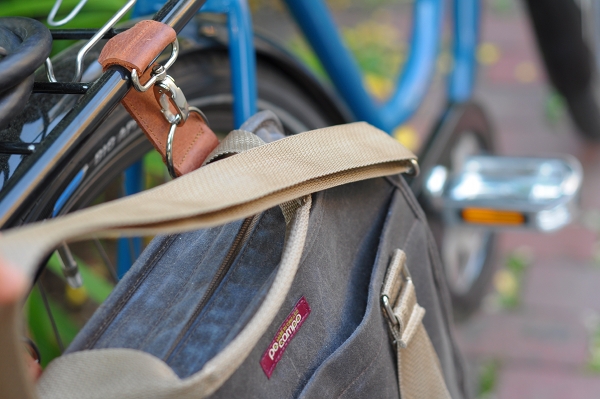 There are two short straps integrated into the pannier, and a longer detachable shoulder strap. While initially managing the system of straps seems complicated, it ends up being very intuitive.
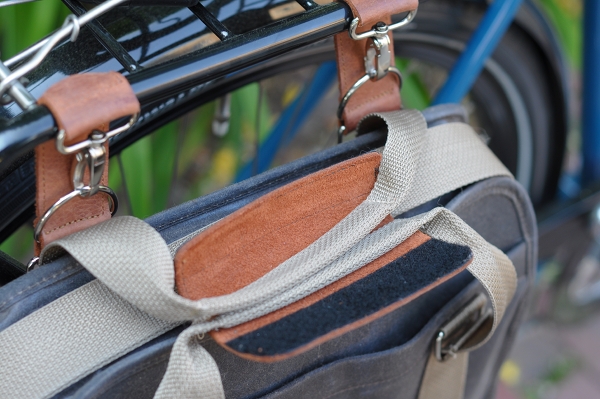 The long shoulder strap folds over the top of the bag. Then, the second of the short straps gets tucked into the leather handle attached to the first, which closes with velcro. This keeps all three straps neatly tucked in and away from the spokes.
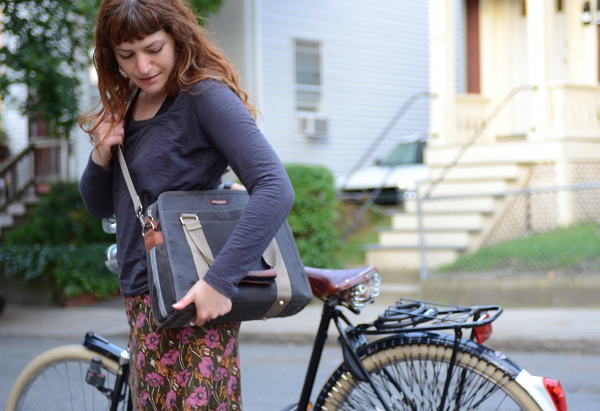 When the bag is off the bike, it can either be handheld, or used as a shoulder or messenger bag. I prefer the latter, especially since adjusting the shoulder strap on the go is very easy - the adjustment buckle slides freely.
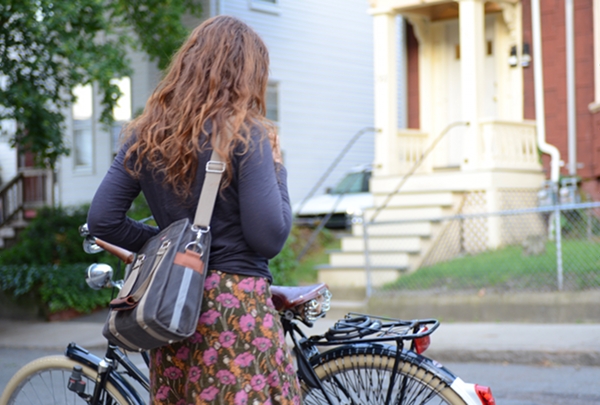 I have walked around with the bag as pictured for a couple of miles and it felt fine. I've also shortened the strap and have worn it over one shoulder, like a handbag. Either way is pretty comfortable and the clasps absolutely do not catch on my clothing. It basically feels like a normal bag to carry, not like a bicycle-specific pannier.
 Another feature of the Po CampoI appreciate is the way it is organised inside. There is a large main compartment, and a side compartment that they refer to as a "file/lock pocket." However, I use it for my laptop, which is a MacBook Air and is the perfect size for it. I use the main compartment for clothing, books, notebooks and my DSLR camera.
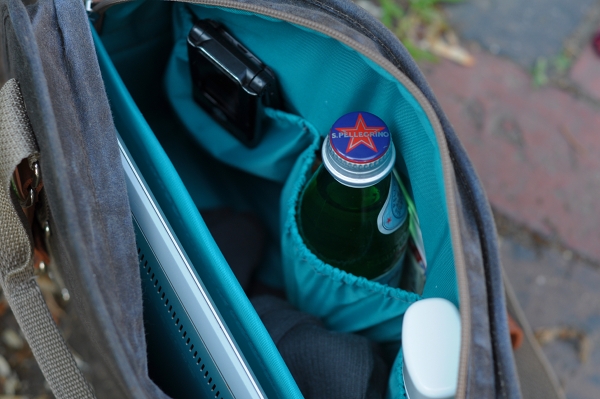 There are also three elasticised interior pockets that will each fit a wallet, phone, writing instruments, or even a small bottle of water.
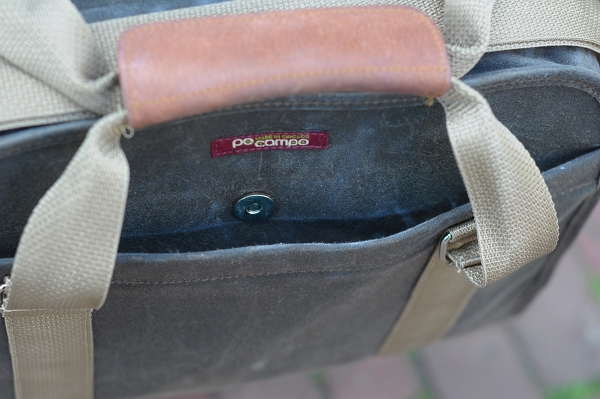 The exterior pocket is quite roomy. It is especially useful for those times you need to remove a sweater or grab some water in traffic.
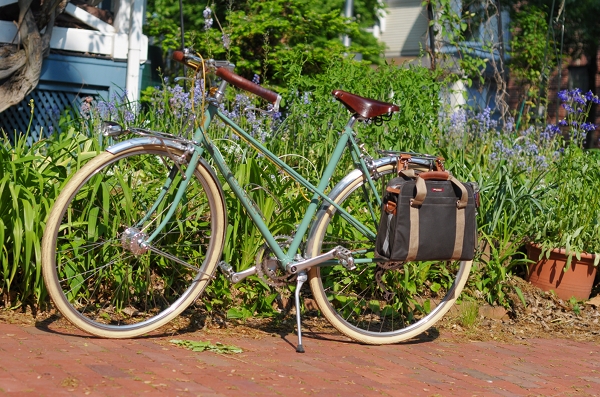 I tend to overpack whenever I leave the house, so this pannier is always bulging with stuff when I use it. Still, the structured design keeps it all looking neat and presentable.
 The reflective strip along the back is nice for extra visibility.
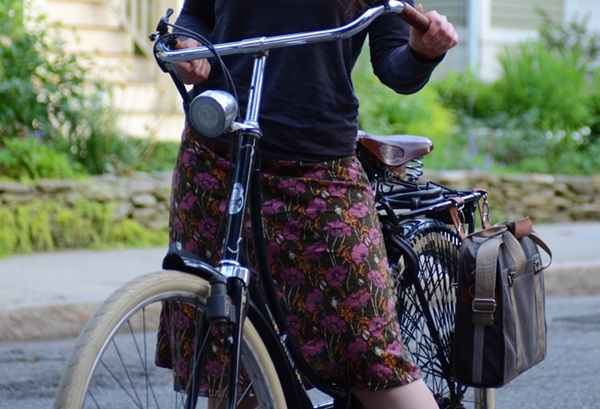 I have tried the Po Campo pannier on five different bikes with different types of racks, and it works well on all of them. I cannot imagine a rack design with which this bag will be incompatible, and in my view that is one of its most valuable features. Other strong points include the durable construction, the professional look, and the ease with which the bag can be used off the bike. This is a small pannier and you will not be able to fit groceries in it; it is really meant as a briefcase/ professional bag and will accommodate only the smaller laptop models. But the compact size has the added benefit of preventing heel strike on bicycles with shorter chainstays.
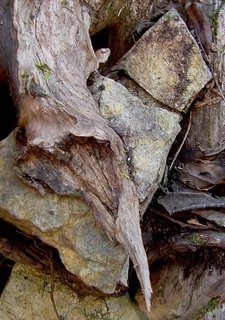
 First things first. Attention everyone. There was a wicked layer of surface hoar that didn't get any sun action today before the clouds started rolling in. It's going to get buried. There are all sorts of facets in the snow in the top 20 cm. What's worrisome is that the surface hoar is growing on a layer of sun crust. Underneath the sun crust is another layer of facets. Check out the snowpit profile.
 So the rest of the trip to Muir was outstanding. Skiing was 7 out of 10, for the windswept snowfield, anyway. The new snow that is forecast should make the skiing even better.
 This is it. Finally our snowpack at Paradise is back to normal at 78 inches. The rain from the last warm spell has stopped and we have up to 18 inches of new snow that has consolidated and another 5 inches of pretty light snow on top of it.


 There are those who object to bicycles built in the Far East (specifically, China and Taiwan
